【Django】Google ログインを最短で実装|social-auth-app-django で Sign in with Google

目次
- 1 user@sinyblog:~/article ❯ 01_section_1.md事前準備
- 2 user@sinyblog:~/article ❯ 02_google.mdGoogle認証
- 3 user@sinyblog:~/article ❯ 03_django.mdDjangoソーシャル認証のパラメータ設定
- 4 user@sinyblog:~/article ❯ 04_section_4.mdビューの定義
- 5 user@sinyblog:~/article ❯ 05_url.mdURLパターンの定義
- 6 user@sinyblog:~/article ❯ 06_section_6.mdテンプレートの設定
Django · Google Authentication · social-auth-app-django
Google アカウントでログインできる仕組み(SSO / Sign in with Google)は、ユーザーのパスワード忘れ問題を解消し、登録障壁を下げる強力な手段です。本記事では social-auth-app-django ライブラリを使い、Django アプリに Google OAuth 認証を 最短で導入する完全手順 を解説します。Google Cloud Console での OAuth クライアント作成から、settings.py 設定、URL ルーティング、テンプレートの「Google でログイン」ボタン追加まで網羅。
この記事では、django-social-authを使ってデモ動画のようなソーシャル認証(GoogleのIDを利用)を実装する手順を解説します。
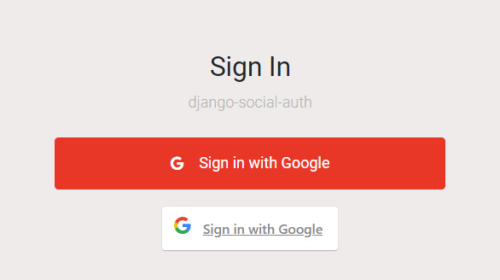
認証ボタンのデザインも2種類用意し、本番サービスでも利用できるレベルのテンプレートになっていると思うので参考にして頂ければ幸いです。
完成形のソースコードは以下のGithubリポジトリにあります。
user@sinyblog:~/article ❯ 01_section_1.md事前準備
まず、仮想環境の作成とアクティベート、必要なモジュールのインストールとDjangoプロジェクト、アプリケーションの作成まで完了させましょう。
仮想環境の作成とアクティベート
以下のコマンドを実行して仮想環境をアクティベートしましょう。
python -m venv env

env\scripts\activate
モジュールのインストール
以下のコマンドを実行してDjango本体とsocial-auth-app-djangoをインストールします。
pip install django social-auth-app-django
Djangoプロジェクトの作成
今回はconfigという名称のプロジェクトを作成します。
django-admin startproject config .
アプリケーションの作成
appという名称のアプリケーションを作成します。
python manage.py startapp app
user@sinyblog:~/article ❯ 02_google.mdGoogle認証
Googleのユーザ認証でログオンするために必要な クライアントキー と クライアントシークレット を取得します。
以下のGoolge Developers Console サイトにアクセスしましょう。
・[プロジェクトの選択] → [新しいプロジェクト] を押します。
・「プロジェクト名」を入れて「作成」ボタンを押します。
・画面左のナビゲーション→APIとサービス→認証情報を選択します。
・「認証情報を作成」ボタンを押し、「OAuthクライアントID]を選択します。
・「同意画面を設定」→User Typeは「外部」を選択→作成
・アプリ情報で「アプリ名、ユーザサポートメール、デベロッパーの連絡先情報」を入力し「保存して次へ」を3回押します。
・再度「認証情報」を選択→「認証情報を作成」→「OAuthクライアントID」を選択します。
・アプリケーションの種類で「ウェブアプリケーション」を選択し「承認済みのリダイレクト URI」に「http://127.0.0.1:8000/social-auth/complete/google-oauth2/」を指定し「作成」ボタンを押します。
「クライアントID」と「クライアントシークレット」が生成されるので控えておきましょう。
user@sinyblog:~/article ❯ 03_django.mdDjangoソーシャル認証のパラメータ設定
config/settings.pyを開いて以下の設定を追加します。
INSTALLED_APPS = [

    'django.contrib.admin',

    'django.contrib.auth',

    'django.contrib.contenttypes',

    'django.contrib.sessions',

    'django.contrib.messages',

    'django.contrib.staticfiles',

    'social_django',  #追加

    'app', #追加

]
MIDDLEWARE = [

    'django.middleware.security.SecurityMiddleware',

    'django.contrib.sessions.middleware.SessionMiddleware',

    'django.middleware.common.CommonMiddleware',

    'django.middleware.csrf.CsrfViewMiddleware',

    'django.contrib.auth.middleware.AuthenticationMiddleware',

    'django.contrib.messages.middleware.MessageMiddleware',

    'django.middleware.clickjacking.XFrameOptionsMiddleware',

    'social_django.middleware.SocialAuthExceptionMiddleware',  #追加

]
TEMPLATES
TEMPLATES = [

    {

        'BACKEND': 'django.template.backends.django.DjangoTemplates',

        'DIRS': [],

        'APP_DIRS': True,

        'OPTIONS': {

            'context_processors': [

                'django.template.context_processors.debug',

                'django.template.context_processors.request',

                'django.contrib.auth.context_processors.auth',

                'django.contrib.messages.context_processors.messages',

                'social_django.context_processors.backends',   #追加

            ],

        },

    },

]
最後に末尾に以下の設定を追加します。
AUTHENTICATION_BACKENDS = [

    'social_core.backends.google.GoogleOAuth2',

    'django.contrib.auth.backends.ModelBackend',

]

LOGIN_URL = 'login'

LOGIN_REDIRECT_URL = 'home'

LOGOUT_URL = 'logout'

LOGOUT_REDIRECT_URL = 'login'

SOCIAL_AUTH_GOOGLE_OAUTH2_KEY = '<クライアントID>'

SOCIAL_AUTH_GOOGLE_OAUTH2_SECRET = '<クライアントシークレット>'
SOCIAL_AUTH_GOOGLE_OAUTH2_KEYとSOCIAL_AUTH_GOOGLE_OAUTH2_SECRETには自分のキー情報を設定しましょう。
user@sinyblog:~/article ❯ 04_section_4.mdビューの定義
app/views.pyに以下のコードを定義します。
from django.shortcuts import render

from django.contrib.auth.decorators import login_required


def login(request):

    return render(request, 'login.html')


@login_required

def home(request):

    return render(request, 'home.html')
ビューはソーシャル認証画面を表示するためのlogin関数とログオン後の画面を表示するhome関数だけ定義しています。
user@sinyblog:~/article ❯ 05_url.mdURLパターンの定義
次にapp/urls.pyを新規に作成し、URLパターンを以下の通り設定します。
from django.urls import path, include

from django.contrib.auth import views as auth_views

from app import views


urlpatterns = [

    path('login/', views.login, name='login'),

    path('logout/', auth_views.LogoutView.as_view(), name='logout'),

    path('social-auth/', include('social_django.urls', namespace='social')),

    path("", views.home, name='home'),

]
ログイン用のURLパターンは先ほどビューで定義したlogin関数を呼び出すようにします。
ログアウトについてはDjangoが標準で提供するauth_views.LogoutViewを呼び出すようにします。
また、以下でdjango-social-authの機能を使えるようにしています。
path('social-auth/', include('social_django.urls', namespace='social')),app/urls.pyをincludeする設定をconfig/urls.pyに追加しておきます。
from django.contrib import admin

from django.urls import path, include


urlpatterns = [

    path('admin/', admin.site.urls),

    path('', include('app.urls')),

]
以上でURLパターンの定義は完了です。
user@sinyblog:~/article ❯ 06_section_6.mdテンプレートの設定
最後にテンプレートを作成します。
まずは必要な静的ファイルを配置します。
sinjorjob / django-social-authをgitcloneした後に、django-social-auth/source/app/static/フォルダを丸ごとappフォルダ直下にコピーします。
次にapp/templatesフォルダを作成し、直下にlogin.htmlとhome.htmlを以下の通し作成します。
login.html
{% load static %}

<!doctype html>

<html lang="ja">


<head>

    <!-- Required meta tags -->

    <meta charset="utf-8">

    <meta name="viewport" content="width=device-width, initial-scale=1, shrink-to-fit=no">

    <link href="https://fonts.googleapis.com/css?family=Roboto:300,400&display=swap" rel="stylesheet">


    <link rel="stylesheet" href="{% static 'fonts/icomoon/style.css' %}">


    <link rel="stylesheet" href="{% static 'css/owl.carousel.min.css' %}">


    <!-- Bootstrap CSS -->

    <link rel="stylesheet" href="{% static 'css/bootstrap.min.css' %}">


    <!-- Style -->

    <link rel="stylesheet" href="{% static 'css/style.css' %}">

    <!-- google login css-->

    <link rel="stylesheet" href="{% static 'css/google.css' %}" />

    <title>Login #6</title>

</head>


<body>


    <div class="d-lg-flex half">

        <div class="bg order-1 order-md-2" style="background-image: url('/static/images/bg_1.jpg');"></div>

        <div class="contents order-2 order-md-1">


            <div class="container">

                <div class="row align-items-center justify-content-center">

                    <div class="col-md-7">

                        <div class="mb-4">

                            <h3>Sign In</h3>

                            <p class="mb-4">django-social-auth</p>

                        </div>

                        <form action="#" method="post">


                            <div class="social-login">

                                <a href="{% url 'social:begin' 'google-oauth2' %}"

                                    class="google btn d-flex justify-content-center align-items-center">

                                    <span class="icon-google mr-3"></span> Sign in with Google

                                </a>

                            </div>


                            <div class="row">

                                <div class="col-md-8 mx-auto my-2 order-md-1">

                                    <button class="login-with-google-btn">

                                        <a href="{% url 'social:begin' 'google-oauth2' %}"> Sign in with Google</a>

                                    </button>

                                </div>

                            </div>


                        </form>

                    </div>

                </div>

            </div>

        </div>


    </div>


    <script src="{% static 'js/jquery-3.3.1.min.js' %}"></script>

    <script src="{% static 'js/popper.min.js' %}"></script>

    <script src="{% static 'js/bootstrap.min.js' %}"></script>

    <script src="{% static 'js/main.js' %}"></script>

</body>


</html>
認証ボタンのaタグのhref属性に以下を設定することでソーシャル認証画面に飛ぶようになります。
<a href="{% url 'social:begin' 'google-oauth2' %}"
今回は以下の2種類の認証ボタンのデザインを用意しています。
home.html
{% load static %}

<!DOCTYPE html>

<html lang="ja">


<head>

    <meta charset="UTF-8" />


    <meta http-equiv="X-UA-Compatible" content="ie=edge" />

    <link href="https://cdn.jsdelivr.net/npm/bootstrap@5.1.3/dist/css/bootstrap.min.css" rel="stylesheet"

        integrity="sha384-1BmE4kWBq78iYhFldvKuhfTAU6auU8tT94WrHftjDbrCEXSU1oBoqyl2QvZ6jIW3" crossorigin="anonymous">

    <link rel="stylesheet" href="{% static 'css/index.css' %}" />

    <!-- google login css-->

    <link rel="stylesheet" href="{% static 'css/google.css' %}" />

    <title>Django Social Auth</title>

</head>


<body>

    <div class="container-fluid">

        <div>

            <h1 class="text-white text-center">{% block title %}{% endblock %}</h1>

            <div class="card p-5">

                <div class="row">

                    <div class="col-sm-12 mb-3">

                        <h4 class="text-center text-black">ようこそ{{ user.first_name }}さん!</h4>

                    </div>


                    <div class="row">

                        <div class="col-md-8 mx-auto my-2 order-md-1">

                            <button class="login-with-google-btn">

                                <a href="{% url 'logout' %}"> Logout</a>

                            </button>

                        </div>

                    </div>

                </div>

            </div>

        </div>

    </div>

</body>

</html>
ログオン後に遷移するhome.htmlにはログアウト機能をつけるため以下のコードを追加しています。
<button class="login-with-google-btn">

    <a href="{% url 'logout' %}"> Logout</a>

</button>
URLパターン(logout)を設定しておくことで、ログアウトボタンを押した際にDjangoが標準で提供するログアウト機能(auth_views.LogoutView.as_view())が呼び出されてログアウトするようになっています。
以上で以下のようなDjangoでソーシャル認証を実装することができます。
以上、「Djangoソーシャル認証を実装する(Google認証)」でした。